Красивый цветной vi/vim в Unix/Linux
Недавно захотел сделать красивый, цветной и понятный синтаксис в текстовом редакторе VI/VIM и сегодня я расскажу в своей статье «Красивый цветной vi/vim в Unix/Linux» как я это сделал.
Чтобы установить цветную тему для Vi/Vim стоит для начала посетить сайт http://vimcolors.com/ или http://cocopon.me/app/vim-color-gallery/ и выбрать себе подходящую.
Скачиваем нужный для работы плагин, выполнив в терминале команду:
$ git clone https://github.com/gmarik/vundle.git ~/.vim/bundle/vundle
Данный образ содержит в себе:
┌(captain@Macbook)─(✓)─(12:34 AM Mon Jan 26)
└─(~/.vim/bundle)─(24 files, 0b)─> ll
total 0
drwxr-xr-x 5 captain staff 170 Jan 25 23:34 Benokai
drwxr-xr-x 7 captain staff 238 Jan 25 22:48 Buffergator
drwxr-xr-x 7 captain staff 238 Jan 25 22:42 FuzzyFinder
drwxr-xr-x 7 captain staff 238 Jan 25 22:42 L9
drwxr-xr-x 5 captain staff 170 Jan 26 00:22 cascadia.vim
drwxr-xr-x 26 captain staff 884 Jan 25 22:43 command-t
drwxr-xr-x 5 captain staff 170 Jan 25 23:34 jQuery
drwxr-xr-x 11 captain staff 374 Jan 25 22:48 nerdtree
drwxr-xr-x 7 captain staff 238 Jan 25 22:42 rails.vim
drwxr-xr-x 12 captain staff 408 Jan 25 22:42 sparkup
drwxr-xr-x 19 captain staff 646 Jan 25 23:34 vim-coffee-script
drwxr-xr-x 8 captain staff 272 Jan 25 23:34 vim-colors-solarized
drwxr-xr-x 12 captain staff 408 Jan 25 22:42 vim-easymotion
drwxr-xr-x 8 captain staff 272 Jan 25 22:42 vim-fugitive
drwxr-xr-x 6 captain staff 204 Jan 25 23:34 vim-github-colorscheme
drwxr-xr-x 6 captain staff 204 Jan 25 23:34 vim-gradle
drwxr-xr-x 6 captain staff 204 Jan 25 23:34 vim-jekyll
drwxr-xr-x 5 captain staff 170 Jan 25 23:34 vim-monokai
drwxr-xr-x 10 captain staff 340 Jan 25 23:34 vim-racket
drwxr-xr-x 6 captain staff 204 Jan 25 23:52 vim-railscasts-theme
drwxr-xr-x 5 captain staff 170 Jan 25 23:34 vim-wombat
drwxr-xr-x 11 captain staff 374 Jan 25 22:39 vundle
drwxr-xr-x 11 captain staff 374 Jan 25 23:34 vundle.vim
drwxr-xr-x 5 captain staff 170 Jan 25 23:34 zoom.vim
После этого, нужно прописать в конфигурационный файл нужные строки.
Открываем конфиг vi/vim:
$ vim ~/.vimrc
[...]

" danirod's vimrc settings
" Author and maintainer: Dani Rodríguez <danirod@outlook.com>
" Get info and fork at: http://github.com/danirod/vimrc
" http://bitbucket.org/danirod/vimrc (mirror)
"
" LICENSE:
" You are free to read and study this bundle or snippets of it and to use
" it on your own vimrc settings. Feel free to tweak and adapt my vimrc to
" suit your needs and to make the changes yours. Attribution to this vimrc
" is not required although is thanked.
"
" CHANGELOG:
" Only information about major and minor releases is provided. To checkout
" full version history including patches and bugfixes please see the complete
" release history at http://github.com/danirod/vimrc/releases.
"
" v1.2 2014-04-13
" * Switch to Vundle for plugin management.
" * Remove Git submodules and replace by Vundle Plugins.
" * Lotsa plugins and colors (Solarized, Fugitive, NERDTree...)
"
" v1.1 2014-02-10
" * Install Vundle for a fast and simple plugin management.
" * Even more compatibility for using this vimrc on GVim.
" * Add a colorscheme and set the default colorscheme.
"
" v1.0 2014-01-20
" * Initial release as a brand new separate repository.
" * Moar settings on a well documented file.
"
" v0.1 2013-08-26 (@ http://github.com/danirod/dotfiles - commit b3f77a6)
" * Initial release to public as a file in my dotfile repository.

" TABLE OF CONTENTS:
" 1. Generic settings
" 2. Vundle plugins
" 3. File settings
" 4. Specific filetype settings
" 5. Colors and UI
" 6. Maps and functions

" ===================
" 1. GENERIC SETTINGS
" ===================
set nocompatible " disable vi compatibility mode
set hidden " hide buffers instead of closing them
set history=1000 " increase history size

" =================
" 2. VUNDLE PLUGINS
" =================
" Init Vundle
filetype off " required by Vundle.
set rtp+=~/.vim/bundle/vundle
call vundle#begin()

" Vundleception. Vundle actually needs to manage Vundle.
Plugin 'gmarik/vundle.vim'

" Plug-ins
Plugin 'scrooloose/nerdtree' " A tree explorer plugin for vim.
Plugin 'tpope/vim-fugitive' " a Git wrapper so awesome it should be illegal.
Plugin 'parkr/vim-jekyll' " Jekyll support
Plugin 'zoom.vim' " Zoom plugin

" Language support
Plugin 'wlangstroth/vim-racket' " Racket
Plugin 'jQuery' " jQuery
Plugin 'kchmck/vim-coffee-script' " CoffeeScript
Plugin 'tfnico/vim-gradle' " Gradle

" Colorschemes
Plugin 'endel/vim-github-colorscheme' " GitHub
Plugin 'altercation/vim-colors-solarized' " Solarized
Plugin 'sickill/vim-monokai' " Monokai
Plugin 'benjaminwhite/Benokai' " Benokai
Plugin 'cschlueter/vim-wombat' " Wombat

" Finish Vundle initialization
call vundle#end()
filetype plugin indent on " Restore filetype

" ================
" 3. FILE SETTINGS
" ================

" As stated by thousands of people... we aren't in the 70s anymore.
" If you need to track the changes you do to your files, use Git.
set noswapfile " disable swap
set nobackup " disable backup

" Modify indenting settings
set autoindent " autoindent always ON.
set expandtab " expand tabs
set shiftwidth=4 " spaces for autoindenting
set softtabstop=4 " remove a full pseudo-TAB when i press <BS>

" Modify some other settings about files
set encoding=utf-8 " always use unicode (god damnit, windows)
set backspace=indent,eol,start " backspace always works on insert mode

" =============================
" 4. SPECIFIC FILETYPE SETTINGS
" =============================
" WARNING: As soon as this section grows over one vertical screen, all
" the content here should be moved to ftplugin folder. I'm serious.

" HTML, CSS/SASS, JS and CoffeScript gets 2 space indenting.
autocmd FileType html,css,sass,scss,javascript,json,*.coffee
 \ setlocal shiftwidth=2 softtabstop=2

" ================
" 5. COLORS AND UI
" ================
" Are we supporting colors?
if &t_Co > 2 || has("gui_running")
 syntax on

 " Show legcy color column at 80 characters.
 " TODO: Push the color column at 120 characters when Java is detected.
 " (and maybe do the same with other languages such as C#?)
 set colorcolumn=80
endif

" Are we supporting a full color pallete?
if &t_Co >= 256 || has("gui_running")
 colorscheme Benokai " monokai trends change, you know ^_^
endif

set showmode " always show which more are we in
set wildmenu " enable visual wildmenu

set nowrap " don't wrap long lines
set number " show line numbers
set relativenumber " show numbers as relative by default
set cursorline " highlight line where the cursor is
set showmatch " higlight matching parentheses and brackets

set linespace=1 " slight linespacing

" =====================
" 6. MAPS AND FUNCTIONS
" =====================
let mapleader="," " I GOTCHA, MAPLEADER ಠ_ಠ

" Make window navigation less painful.
" this one is taken from https://gist.github.com/JeffreyWay/6753834
map <C-h> <C-w>h
map <C-j> <C-w>j
map <C-k> <C-w>k
map <C-l> <C-w>l

" Better tabbing using <C-tab> (why didn't I think of this earlier?)
map <C-TAB> :tabn<CR>
map <C-S-TAB> :tabp<CR>

" NERDTree: map ,nt for toggling NERDTree. Faster than the old :NT command
" since I don't have to hold Shift whenever I want to display NERDTree.
command NT NERDTree " Legacy. Classy. I didn't know the power of maps yet.
nmap <Leader>nt :NERDTreeToggle<cr>

" Now, in order to easily swap between relative numbers and non-relative
" numbers, let's declare a function that does the job for us: it sets
" relativenumbers if it's OFF, it unsets it if it's ON.
function! ToggleRelativeNumber()
 if &relativenumber == 1
 set norelativenumber
 set number
 else
 set relativenumber
 endif
endfunction

" Finally, to make toggling easier, I just have to map an unused key, such
" as F5. This mapping will work both in Normal and in Insert mode. By
" pressing this key, relative numbers are automatically toggled.
nmap <F5> :call ToggleRelativeNumber()<CR>
imap <F5> <Esc>:call ToggleRelativeNumber()<CR>
Я в ходе установки выбрал и установил себе тему с названием «Benokai», ее можно заменить в строке:
[...]
colorscheme Benokai " monokai trends change, you know ^_^
[...]
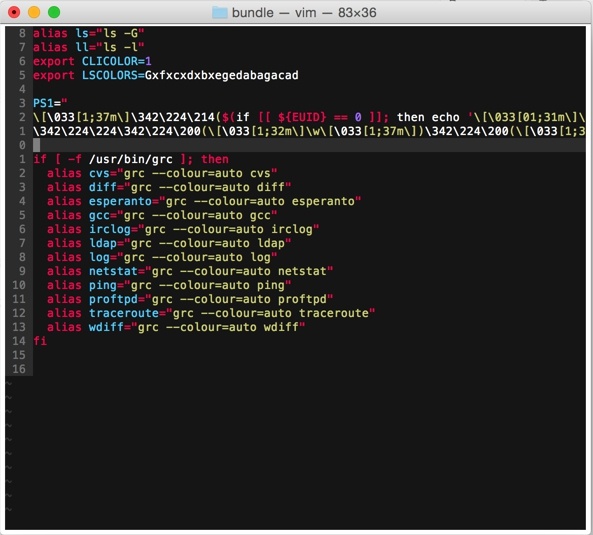
Так выглядит моя тема для Vim
Как по мне, очень солидно выглядит и все сразу видно что и где, хотя это темноватая тема. Попозже скачаю и попробую другие темы.
Установка Plugins.
Запустите vim и выполните :PluginInstall
Или в командной строке запустите команду:
$ vim +PluginInstall +qall
Для удаления плагина выполните в запущенном vi/vim:
:bdelete
Плагины, которые Вы добавили к вашему ~ / .vimrc файла теперь установлен!
Если вы хотите обновить плагины, вы можете использовать один из этих двух команд:
:PluginUpdate
или
:PluginInstall!
«!» в конце команды «: PluginInstall!» в основном говорит vundle переустановить все плагины.
После обновления, вы можете увидеть, какие плагины были на самом деле зависит от ввода «и» в vundle окна плагина. Если вы хотите, чтобы увидеть полный журнал операций, которые имели место во время или обновления или установки, типа «l» для просмотра всего журнала.
Управление плагинами с Vundle
Теперь, когда вы получили новость, как установить плагины, давайте рассмотрим некоторые другие функции, которые могут помочь вам дать больше информации о vundle.
Поиск новых плагинов
Один из самых полезных функций vundle является умение найти и установить больше плагинов.
Мы можем перечислить все плагин, который vundle можете найти на Scripts сайта Vim с помощью команды:
:Plugins
или (у меня не работал 1-й вариант):
:PluginSearch!
«!» в конце команды освежает локальный список из скриптов Vim на сайте .
Если вы хотим, найти конкретный плагин, то можно использовать этот же синтаксис вроде этого:
:PluginSearch! plugin_query
Это откроет новое окно с результатами нашего запроса. Если вы недавно обновили локальную базу данных, вы можете отказаться от «!» от команды. Так что, если вы ищете «уценки» (markdown), вы можете получить что-то вроде этого:
PluginSearch markdown


"Keymap: i - Install plugin; c - Cleanup; s - Search; R - Reload list
"Search results for: markdown
Plugin 'instant-markdown.vim'
Plugin 'MarkdownFootnotes'
Plugin 'Markdown'
Plugin 'Markdown-syntax'
Как вы можете видеть вверху, вы можете легко установить любой из плагинов, переместил в соответствии с плагином и набрав «i».
Эта команда будет скачать и установливать плагин, но это не будет обновлять файл ~ / .vimrc, чтобы сделать его автозагрузку правильной.
Таким образом, чтобы установить «MarkdownFootnotes» плагин, мы будет двигаться наш курсор к этой строке нажимая ‘I’:
"Keymap: i - Install plugin; c - Cleanup; s - Search; R - Reload list
"Search results for: markdown
Plugin 'instant-markdown.vim'
Plugin 'MarkdownFootnotes' # move here and press "i"
Plugin 'Markdown'
Plugin 'Markdown-syntax'
Вы можете удалить vundle буфер при завершении установки:
:bdelete
После нужно отредактировать файл ~ / .vimrc, набрав:
:e ~/.vimrc
Добавьте новую строку с плагинами:
set nocompatible
filetype off
set rtp+=~/.vim/bundle/vundle/
call vundle#rc()

Plugin 'gmarik/vundle'

Plugin 'scrooloose/nerdtree.git'

Plugin 'Buffergator'

Plugin 'MarkdownFootnotes'

filetype plugin indent on
Вы можете сохранить и закрыть файл.
Управление установленными плагинами
После того, как вы установили некоторые плагины, вы можете управлять ими с vundle.
Чтобы увидеть всех установленных плагинов, введите следующее:
:PluginList
" My Plugins
Plugin 'gmarik/vundle'
Plugin 'scrooloose/nerdtree.git'
Plugin 'Buffergator'
Plugin 'MarkdownFootnotes'
Если вам нужно удалить плагин, это должно быть сделано в два этапа.
Вы можете удалить плагин файлов, перечислив их, а затем нажать клавишу «D», когда курсор находится на плагин, который вы хотите удалить. Таким образом, чтобы удалить наш «MarkdownFootnotes» плагин, мы можем выбрать его и нажать «D»:
" My Plugins
Plugin 'gmarik/vundle'
Plugin 'scrooloose/nerdtree.git'
Plugin 'Buffergator'
Plugin 'MarkdownFootnotes' # Press "D" when selected
На данный момент, vundle до сих пор этот плагин имеет свои конфигурации, но файлы плагина не установлены. Вы можете переустановить файлы снова наберите:
:PluginInstall
Мы не будем делать это. Вместо этого, мы будем удалять запись из нашей ~ / .vimrc файла:
:e ~/.vimrc
set nocompatible
filetype off
set rtp+=~/.vim/bundle/vundle/
call vundle#rc()

Plugin 'gmarik/vundle'

Plugin 'scrooloose/nerdtree.git'

Plugin 'Buffergator'

filetype plugin indent on
Это завершит удаление плагина из вашей системы.
Простой способ сделать это — удалить его из файла ~/.vimrc в первую очередь.
После того как вы удалили его, вы можете вызвать эту команду, которая удаляет любые плагины, которые не находятся в файле файле ~/.vimrc автоматически (он будет просить вас подтверждение):
:PluginClean
" Removing Plugins:
Plugin 'MarkdownFootnotes'

. . .
Continue? [Y/n]:
Вы можете ввести «Y», чтобы удалить все неиспользуемые плагины.
Примеры добавления своих, скачанных тем
1. Способ (Отредактировать и добавить к существующему).
Скачиваем и данную тему (файл) стоит положить:
$ cd /.vim/bundle/vundle
$ git clone https://github.com/vim-scripts/cascadia.vim.git
Так же стоит прописать в данный файл строку для установки плагина:
[...]
Plugin 'cascadia/' " cascadia
[...]
И прописать строку, в ней будет передан параметр в котором говорится что нужно использовать именно эту тему:
[...]
colorscheme cascadia " cascadia
[...]
Вот и все.
2. Способ (Отредактировать или создать новый файл)
Скачиваем и данную тему (файл) стоит положить:
$ mkdir ~/.vim/colors
$ cd /.vim/colors
$ git clone https://github.com/vim-scripts/cascadia.vim.git
Но тогда нужно отредактировать файл (путь ) в ~/.vimrc и прописать правильный путь к расположению файла в виде:
$ vim ~/.vimrc

[...]
set rtp+=~/.vim/colors
[...]
Так же стоит прописать в данный файл строку для установки плагина:
[...]
Plugin 'cschlueter/vim-wombat' " Wombat
[...]
Остальное все так же как и в 1м способе.
Я делал еще так…
# cd ~/.vim/ git clone https://github.com/cdmedia/itg_flat_vim.git
После чего я переношу файл в нужное место ( чтобы не прописывать путь к нему):
# mv ~/.vim/colors/itg_flat_vim/colors/itg_flat.vim ~/.vim/colors/
Прописываем в ~/.vimrc свою тему:
# vim ~/.vimrc
"return" 2>&- || "exit"
syntax on
colorscheme itg_flat
set number
Юзаем. Это самый простой способ.
На этом я завершаю свою тему «Красивый цветной vi/vim в Unix/Linux».