Работа с AWS SQS и Terraform в Unix/Linux
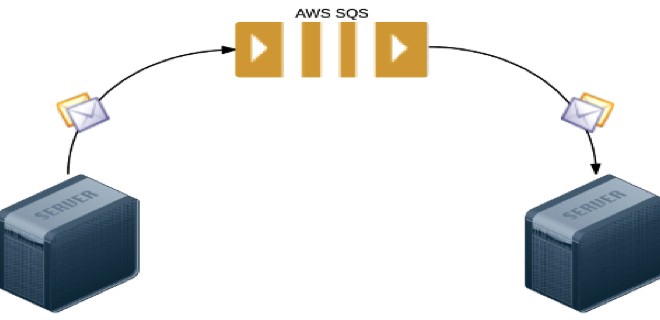
Amazon Simple Queue Service (Amazon SQS) – это веб-сервис, предоставляющий доступ к очередям сообщений, в которых сообщения хранятся в ожидании обработки. С помощью Amazon SQS можно быстро создавать приложения с использованием очереди сообщений и запускать их на любом компьютере.
Amazon SQS предоставляет надежный и безопасный размещенный сервис очередей сообщений с широкими возможностями масштабирования для хранения сообщений при их передаче с одного компьютера на другой. С помощью Amazon SQS можно перемещать данные между различными компонентами распределенного приложения без потери сообщений и необходимости в постоянной доступности каждого компонента. При обмене конфиденциальными данными между приложениями можно использовать шифрование на стороне сервера Amazon SQS (SSE), интегрированное с сервисом AWS Key Management Service (KMS).
Сервис Amazon SQS позволяет создать распределенное приложение и разделить его компоненты, при этом осуществляется непосредственное взаимодействие с Amazon Elastic Compute Cloud (Amazon EC2) и другими инфраструктурными веб-сервисами AWS.
Установка terraform в Unix/Linux
Установка крайне примитивная и я описал как это можно сделать тут:
Установка terraform в Unix/Linux
Так же, в данной статье, я создал скрипт для автоматической установки данного ПО. Он был протестирован на CentOS 6/7, Debian 8 и на Mac OS X. Все работает должным образом!
Чтобы получить помощь по использованию команд, выполните:
$ terraform
Usage: terraform [--version] [--help] <command> [args]

The available commands for execution are listed below.
The most common, useful commands are shown first, followed by
less common or more advanced commands. If you're just getting
started with Terraform, stick with the common commands. For the
other commands, please read the help and docs before usage.

Common commands:
    apply              Builds or changes infrastructure
    console            Interactive console for Terraform interpolations
    destroy            Destroy Terraform-managed infrastructure
    env                Workspace management
    fmt                Rewrites config files to canonical format
    get                Download and install modules for the configuration
    graph              Create a visual graph of Terraform resources
    import             Import existing infrastructure into Terraform
    init               Initialize a Terraform working directory
    output             Read an output from a state file
    plan               Generate and show an execution plan
    providers          Prints a tree of the providers used in the configuration
    push               Upload this Terraform module to Atlas to run
    refresh            Update local state file against real resources
    show               Inspect Terraform state or plan
    taint              Manually mark a resource for recreation
    untaint            Manually unmark a resource as tainted
    validate           Validates the Terraform files
    version            Prints the Terraform version
    workspace          Workspace management

All other commands:
    debug              Debug output management (experimental)
    force-unlock       Manually unlock the terraform state
    state              Advanced state management
Приступим к использованию!
Работа с AWS SQS и Terraform в Unix/Linux
У меня есть папка terraform, в ней у меня будут лежать провайдеры с которыми я буду работать. Т.к в этом примере я буду использовать AWS, то создам данную папку и перейду в нее. Далее, в этой папке, стоит создать:
$ mkdir examples modules
В папке examples, я буду хранить так званые «плейбуки» для разварачивания различных служб, например — zabbix-server, grafana, web-серверы и так далее. В modules директории, я буду хранить все необходимые модули.
Начнем писать модуль, но для этой задачи, я создам папку:
$ mkdir modules/sqs
Переходим в нее:
$ cd modules/sqs
Открываем файл:
$ vim sqs.tf
В данный файл, вставляем:
#---------------------------------------------------
# Create AWS SQS
#---------------------------------------------------
resource "aws_sqs_queue" "sqs_queue" {
    name                        = "${var.enable_fifo_queue ? "${lower(var.name)}-sqs-${lower(var.environment)}.fifo" : "${lower(var.name)}-sqs-${lower(var.environment)}" }"
    delay_seconds               = "${var.delay_seconds}"
    max_message_size            = "${var.max_message_size}"
    message_retention_seconds   = "${var.message_retention_seconds}"
    receive_wait_time_seconds   = "${var.receive_wait_time_seconds}"
    visibility_timeout_seconds  = "${var.visibility_timeout_seconds}"

    redrive_policy            = "${length(var.sqs_dead_letter_queue_arn) > 0 ? data.template_file.redrive_policy.rendered : "" }"

    fifo_queue                  = "${var.enable_fifo_queue}"
    content_based_deduplication = "${var.content_based_deduplication}"

    kms_master_key_id                 = "${var.kms_master_key_id}"
    kms_data_key_reuse_period_seconds = "${var.kms_data_key_reuse_period_seconds}"


    tags {
        Name            = "${lower(var.name)}-sqs-${lower(var.environment)}"
        Environment     = "${var.environment}"
        Orchestration   = "${var.orchestration}"
        Createdby       = "${var.createdby}"
    }

    depends_on  = ["data.template_file.redrive_policy"]
}

data "template_file" "redrive_policy" {
    template = "${file("${path.module}/policies/redrive_policy.json.tpl")}"

    vars {
        deadLetterTargetArn = "${var.sqs_dead_letter_queue_arn}"
        maxReceiveCount     = "${var.maxReceiveCount}"
    }
}
#---------------------------------------------------
# Create AWS SQS queue policy
#---------------------------------------------------
resource "aws_sqs_queue_policy" "sqs_queue_policy" {
    queue_url   = "${aws_sqs_queue.sqs_queue.id}"
    policy      = "${data.template_file.sqs_queue_policy.rendered}"

    depends_on  = ["aws_sqs_queue.sqs_queue", "data.template_file.sqs_queue_policy"]
}

data "template_file" "sqs_queue_policy" {

    template = "${file("${path.module}/policies/sqs_queue_policy.json.tpl")}"

    vars {
        sqs_arn  = "${aws_sqs_queue.sqs_queue.arn}"
    }

}
Открываем файл:
$ vim variables.tf
И прописываем:
#-----------------------------------------------------------
# Global or/and default variables
#-----------------------------------------------------------
variable "name" {
  description = "Name to be used on all resources as prefix"
  default     = "TEST-SQS"
}

variable "environment" {
    description = "Environment for service"
    default     = "STAGE"
}

variable "orchestration" {
    description = "Type of orchestration"
    default     = "Terraform"
}

variable "createdby" {
    description = "Created by"
    default     = "Vitaliy Natarov"
}

#variable "account-id" {
#    description = "Account ID"
#    default     = ""
#}

variable "delay_seconds" {
    description = "The time in seconds that the delivery of all messages in the queue will be delayed. An integer from 0 to 900 (15 minutes). The default for this attribute is 0 seconds."
    default     = "90"
}

variable "max_message_size" {
    description = "The limit of how many bytes a message can contain before Amazon SQS rejects it. An integer from 1024 bytes (1 KiB) up to 262144 bytes (256 KiB). The default for this attribute is 262144 (256 KiB)."
    default     = "2048"
}

variable "message_retention_seconds" {
    description = "The number of seconds Amazon SQS retains a message. Integer representing seconds, from 60 (1 minute) to 1209600 (14 days). The default for this attribute is 345600 (4 days)."
    default     = "86400"
}

variable "receive_wait_time_seconds" {
    description = "The time for which a ReceiveMessage call will wait for a message to arrive (long polling) before returning. An integer from 0 to 20 (seconds). The default for this attribute is 0, meaning that the call will return immediately."
    default     = "10"
}

variable "enable_fifo_queue" {
    description = "Boolean designating a FIFO queue. If not set, it defaults to false making it standard."
    default     = "false"
}

variable "content_based_deduplication" {
    description = "Enables content-based deduplication for FIFO queues."
    default     = "false"
}

variable "kms_master_key_id" {
    description = "The ID of an AWS-managed customer master key (CMK) for Amazon SQS or a custom CMK."
    default     = "alias/aws/sqs"
}

variable "kms_data_key_reuse_period_seconds" {
    description = "The length of time, in seconds, for which Amazon SQS can reuse a data key to encrypt or decrypt messages before calling AWS KMS again. An integer representing seconds, between 60 seconds (1 minute) and 86,400 seconds (24 hours). The default is 300 (5 minutes)."
    default     = "300"
}

variable "maxReceiveCount" {
    description = "Value for redrive_policy (set maxReceiveCount for dead_letter_queue)"
    default     = "10"
}

variable "sqs_dead_letter_queue_arn" {
    description = "Set sqs arn for dead_letter_queue"
    default     = ""
}

variable "visibility_timeout_seconds" {
    description = "the timeout in seconds of visibility of the message"
    default     = 30
}
Собственно в этом файле храняться все переменные. Спасибо кэп!
Открываем последний файл:
$ vim outputs.tf
И в него вставить нужно следующие строки:
output "sqs_arn" {
  value = "${aws_sqs_queue.sqs_queue.arn}"
}

output "sqs_id" {
  value = "${aws_sqs_queue.sqs_queue.id}"
}
Создаем папку для полисей:
$ mkdir policies
Создаем файл с полисями:
$ vim policies/redrive_policy.json.tpl
Прописываем:
{
    "deadLetterTargetArn": "${deadLetterTargetArn}",
    "maxReceiveCount": ${maxReceiveCount}
}
И еще один файл:
Создаем файл с полисями:
$ vim policies/sqs_queue_policy.json.tpl
Прописываем:
{
  "Version": "2012-10-17",
  "Id": "sqspolicy",
  "Statement": [
    {
      "Sid": "First",
      "Effect": "Allow",
      "Principal": "*",
      "Action": "sqs:SendMessage",
      "Resource": "${sqs_arn}",
      "Condition": {
        "ArnEquals": {
          "aws:SourceArn": "${sqs_arn}"
        }
      }
    }
  ]
}
Переходим теперь в папку aws/examples и создадим еще одну папку для проверки написанного чуда:
$ mkdir sqs && cd $_
Внутри созданной папки открываем файл:
$ vim main.tf
И вставим в него следующий код:
#
# MAINTAINER Vitaliy Natarov "vitaliy.natarov@yahoo.com"
#
terraform {
  required_version = "> 0.9.0"
}
provider "aws" {
    region  = "us-east-1"
    # alias = "us-east-1"
    shared_credentials_file = "${pathexpand("~/.aws/credentials")}"
     # access_key = "${var.aws_access_key}"
     # secret_key = "${var.aws_secret_key}"
}

module "sqs" {
    source                              = "../../modules/sqs"
    name                                = "TEST-SQS"
    environment                         = "PROD"

    #Enable Fifo
    #enable_fifo_queue           = true
    #content_based_deduplication = true

    #sqs_dead_letter_queue_arn   = "arn:aws:sqs:us-east-1:316963130188:my_sqs"
}
Еще полезности:
Работа с AWS IAM и Terraform в Unix/Linux
Работа с AWS VPC и Terraform в Unix/Linux
Работа с AWS S3 и Terraform в Unix/Linux
Работа с AWS EC2 и Terraform в Unix/Linux
Работа с AWS ASG(auto scaling group) и Terraform в Unix/Linux
Работа с AWS ELB и Terraform в Unix/Linux
Работа с AWS Route53 и Terraform в Unix/Linux
Работа с AWS RDS и Terraform в Unix/Linux
Работа с AWS SNS и Terraform в Unix/Linux
Все уже написано и готово к использованию. Ну что, начнем тестирование. В папке с вашим плейбуком, выполняем:
$ terraform init
Этим действием я инициализирую проект. Затем, подтягиваю модуль:
$ terraform get
PS: Для обновление изменений в самом модуле, можно выполнять:
$ terraform get -update
Проверим валидацию:
$ terraform validate
Запускем прогон:
$ terraform plan
Мне вывело что все у меня хорошо и можно запускать деплой:
$ terraform apply
Как видно с вывода, — все прошло гладко! Чтобы удалить созданное творение, можно выполнить:
$ terraform destroy
Весь материал аплоаджу в github аккаунт для удобства использования:
$ git clone https://github.com/SebastianUA/terraform.git
Вот и все на этом. Данная статья «Работа с AWS SQS и Terraform в Unix/Linux» завершена.